Tagged: Nginx

秒懂系列|Apache和NGINX如何按天分割日志

默认情况下ApacheNGINX等web服务器,是没有帮我们按天分日志的,而是把所有日志放到一个文件,当流量大而日志多的时候,管理起来非常方便,一方面是内容多不易查找定位问题,另一方面文件也会越来越大,无效内容越来越多。
常规做法是把日志按天分割,网上很多通过 写脚本+定时任务 来做的,这其实有点多余,而且不好维护,Linux本身自带了很多日志处理程序,比如:logrotate ,它可以实现日志的自动滚动,日志归档等功能。
下面我们介绍使用 logrotate 实现
- Apache按天分割日志
- Nginx按天分割日志

Apache

Apache自身即成了 logrotate,一般在 /usr/local/apache2/bin/rotatelogs
先找到你的 rotatelogs 路径

locate rotatelogs

/usr/local/apache2/bin/rotatelogs

在你的 VirtualHost 模块添加或替换

<VirtualHost *:80>
    ......
    ErrorLog "| /usr/local/apache2/bin/rotatelogs /data/logs/apache/979137.com-error_log-%Y%m%d 86400 480"
    CustomLog "| /usr/local/apache2/bin/rotatelogs /data/logs/apache/979137.com-access_log-%Y%m%d 86400 480" common
</VirtualHost>

指定分割时间:86400 默认单位为s。也就是24小时
指定分区时差:480 默认单位m,也就是8小时

只保留30天日志,自动清理脚本:

#!/bin/bash

LOG_PATH_APACHE="/data/logs/apache/"
DAYS_AGO=date -d "-30 day" +%Y%m%d
\rm -rf ${LOG_PATH_APACHE}*log-${DAYS_AGO}

加入到crontab,每天执行一次即可

0 4 * * * /bin/bash /data/cron/clear_logs.sh > /dev/null 2&>1

NGINX

假设:
- 日志在 /data/logs/nginx/ 下面
- Nginx 安装在 /usr/local/nginx/

1、在 /etc/logrotate.d 目录下创建一个 Nginx 的配置文件 Nginx 配置内容如下

/data/logs/nginx/xxx.qq.com-access_log /data/logs/nginx/xxx.qq.com-error_log {
    su nobody nobody
    daily
    rotate 30
    notifempty
    sharedscripts
    postrotate
    if [ -f /usr/local/nginx/logs/nginx.pid ]; then
        /bin/kill -USR1 /bin/cat /usr/local/nginx/logs/nginx.pid
    fi
    endscript
}

配置解释:
1)配置需要分割的日志文件,也可以用 * 代替
2)su nobody nobody :一般我们的日志目录是允许所有用户进行写操作的,logrotate 认为这不是不安全的,这时 logrotate 会报错如下:

error: skipping "/data/logs/nginx/cafe.qq.com-error_log" because parent directory has insecure permissions (It's world writable or writable by group which is not "root") Set "su" directive in config file to tell logrotate which user/group should be used for rotation.

所以我们需要在配置里使用 su 切换身份执行
3)daily :日志文件每天进行滚动
4)rotate 30 :保留30天的日志
5)notifempty:日志文件为空不进行滚动
6)sharedscripts :运行postrotate脚本
9)/bin/kill -USR1 \/bin/cat /usr/local/nginx/logs/nginx.pid\ :Nginx平滑重启,也即让Nginx重新生成文件

2、执行logrotate

/usr/sbin/logrotate -f /etc/logrotate.d/nginx

如此,Nginx就会自动的按天产生日志了!

秒懂系列|Apache和NGINX退出自动重启

有时候,我们的Web服务器如Apache、NGINX可能因为某些原因退出了,这时候如果没有及时发现,就会影响服务,所以搞个自动重启是很有必要滴

Apache

#!/bin/sh
HTTPD_NUM=`ps aux | grep -P "(bin/httpd)|(./httpd)" | grep -v "vim" | grep -v "grep" | wc -l`
if [ ${HTTPD_NUM} -eq 0 ]; then
    /usr/local/apache/bin/apachectl restart
fi

Nginx

#!/bin/sh
NGINX_NUM=`ps aux | grep -P "nginx" | grep -v "vim" | grep -v "grep" | wc -l`
if [ ${NGINX_NUM} -eq 0 ]; then
    /usr/local/nginx/sbin/nginx
fi

加入crontab,每分钟检查一次

* * * * * /bin/bash /data/cron/apache_restart.sh > /dev/null 2 >& 1
* * * * * /bin/bash /data/cron/nginx_restart.sh > /dev/null 2 >&1

原理很简单,就是判断是否有进程,如果木有了,执行重启操作!

全民https时代:如何免费获取SSL证书并部署到服务器

如今各大网站基本都披上了https,绿色的锁,看着好安全的样子,AppStore更是要求开发者必须使用https作为应用的服务器端接口协议。如今不上个https都没脸出来混?笔者思来想去,准备给自己的博客加个https,洋气一回

获得SSL证书:

免费的SSL证书有很多,这里推荐腾讯云,全球领先的云服务商,值得信赖!
腾讯云免费提供的证书是域名型免费版(DV)
首先进入腾讯云SSL产品页,点击购买,
https://cloud.tencent.com/product/ssl

选择免费版

输入域名和邮箱等信息

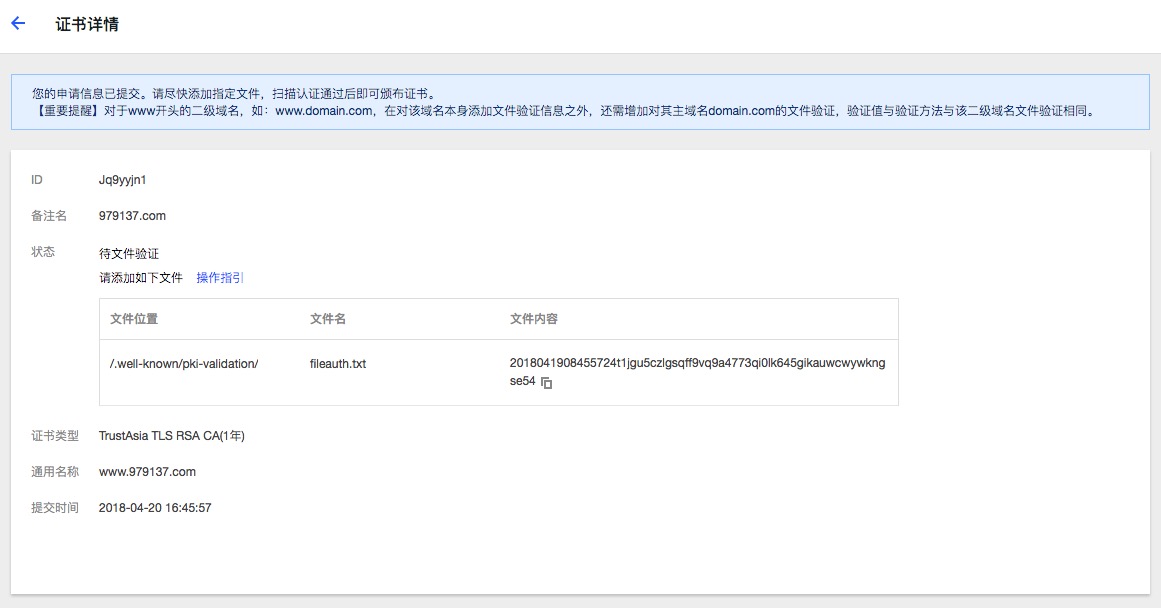
验证域名

下载证书

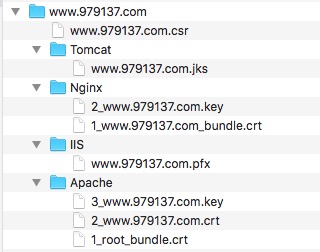
按照流程走完,就可以获得证书了!解压后可以获得支持多种Web服务器的证书

在服务器部署SSL功能(这里以NGINX为例)

server {
    listen  80; 
    listen  443 ssl;
    ...
    if ($server_port != 443) {
        rewrite (.*) https://$host$1 permanent;
    }
    # 证书包下Nginx目录内的crt文件路径,建议写绝对路径
    ssl_certificate  /home/www/hosts/979137.com.crt;
    # 证书包下Nginx目录内的key文件路径,建议写绝对路径
    ssl_certificate_key  /home/www/hosts/979137.com.key;
    ssl_session_timeout  5m;
    ssl_protocols SSLv2 SSLv3 TLSv1;
    ssl_ciphers ALL:!ADH:!EXPORT56:RC4+RSA:+HIGH:+MEDIUM:+LOW:+SSLv2:+EXP;
    ssl_prefer_server_ciphers on;
    ...
}

如果你希望你的网站同时支持http和https,把下面三行删掉就行!

if ($server_port != 443) {
    rewrite (.*) https://$host$1 permanent;
}

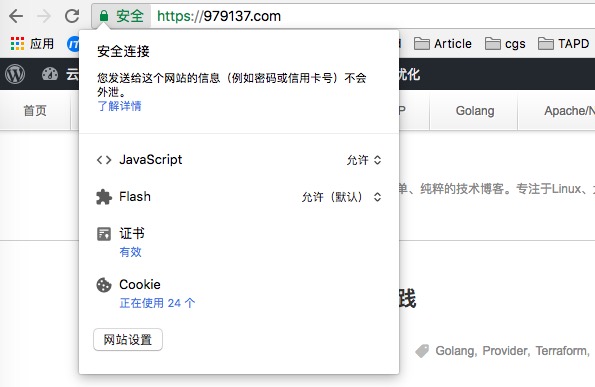
完成!重启NGINX,验证下,

very good !

Linux查看Nginx、Apache、MySQL、PHP的编译参数

软件安装好了,想查看当初编译时的参数,怎么搞?

1、Nginx,可以通过 -V 参数查看Nginx版本及编译参数

/usr/local/nginx/sbin/nginx -V

nginx version: nginx/1.10.2
built by gcc 4.4.6 20110731 (Red Hat 4.4.6-4) (GCC)
configure arguments: --prefix=/usr/local/nginx/ --with-http_image_filter_module --with-http_gunzip_module --with-http_gzip_static_module --with-http_dav_module --with-http_auth_request_module --with-http_secure_link_module --with-http_slice_module --with-http_stub_status_module --with-stream --with-pcre=/usr/local/tools/pcre-8.38 --with-zlib=/usr/local/tools/zlib-1.2.8

2、Apache,编译参数存放在 apache 的 config.nice 文件,前提时,没有做过 make clean

locate config.nice | grep apache | xargs cat

#! /bin/sh
#
# Created by configure

"./configure" \
"--with-apr=/usr/local/apr/" \
"--with-apr-util=/usr/local/apr-util/" \
"--with-pcre=/usr/local/pcre/" \
"ap_cv_void_ptr_lt_long=no" \
"--enable-proxy" \
"--enable-proxy-connect" \
"--enable-proxy-ftp" \
"--enable-proxy-http" \
"--enable-proxy-scgi" \
"--enable-proxy-ajp" \
"--enable-proxy-balancer" \
"$@"

3、MySQL,利用 msyqlbug 工具,查看MySQL信息

VISUAL=vim; export VISUAL; mysqlbug

...
Some paths: /usr/bin/perl /usr/bin/make /usr/bin/gmake /usr/bin/gcc /usr/bin/cc
GCC: Using built-in specs.
Target: x86_64-redhat-linux
Configured with: ../configure --prefix=/usr --mandir=/usr/share/man --infodir=/usr/share/info --with-bugurl=http://bugzilla.redhat.com/bugzilla --enab
le-bootstrap --enable-shared --enable-threads=posix --enable-checking=release --with-system-zlib --enable-__cxa_atexit --disable-libunwind-exceptions
--enable-gnu-unique-object --enable-languages=c,c++,objc,obj-c++,java,fortran,ada --enable-java-awt=gtk --disable-dssi --with-java-home=/usr/lib/jvm/j
ava-1.5.0-gcj-1.5.0.0/jre --enable-libgcj-multifile --enable-java-maintainer-mode --with-ecj-jar=/usr/share/java/eclipse-ecj.jar --disable-libjava-mul
tilib --with-ppl --with-cloog --with-tune=generic --with-arch_32=i686 --build=x86_64-redhat-linux
Thread model: posix
gcc version 4.4.6 20110731 (Red Hat 4.4.6-4) (GCC)
Compilation info (call): CC='/usr/local/gcc-4.3.4/bin/gcc' CFLAGS=' -fPIC -Wall -O3 -g -static-libgcc -fno-omit-frame-pointer -fno-strict-aliasing -D
DBUG_OFF -DMY_PTHREAD_FASTMUTEX=1' CXX='/usr/local/gcc-4.3.4/bin/g++' CXXFLAGS=' -fPIC -Wall -Wno-unused-parameter -fno-implicit-templates -fno-exce
ptions -fno-rtti -O3 -g -static-libgcc -fno-omit-frame-pointer -fno-strict-aliasing -DDBUG_OFF -DMY_PTHREAD_FASTMUTEX=1' LDFLAGS='' ASFLAGS=''
Compilation info (used): CC='/usr/local/gcc-4.3.4/bin/gcc' CFLAGS=' -fPIC -Wall -O3 -g -static-libgcc -fno-omit-frame-pointer -fno-strict-aliasing -D
DBUG_OFF -DMY_PTHREAD_FASTMUTEX=1' CXX='/usr/local/gcc-4.3.4/bin/g++' CXXFLAGS=' -fPIC -Wall -Wno-unused-parameter -fno-implicit-templates -fno-exce
ptions -fno-rtti -O3 -g -static-libgcc -fno-omit-frame-pointer -fno-strict-aliasing -DDBUG_OFF -DMY_PTHREAD_FASTMUTEX=1' LDFLAGS='' ASFLAGS=''
LIBC:
...
...

4、PHP,可以通过 -i 参数可以打印PHP全局变量和安装信息

/usr/bin/php -i | grep configure

Configure Command => './configure' '--prefix=/usr/local/php/' '--enable-fpm' '--enable-opcache' '--enable-inline-optimization' '--with-libxml-dir=/usr/local/libxml2/' '--with-curl=/usr/local/curl/' '--enable-dba' '--with-gd' '--enable-gd-native-ttf' '--enable-gd-jis-conv' '--with-jpeg-dir=/usr/local/jpeg/' '--with-png-dir=/usr/local/libpng/' '--with-zlib-dir=/usr/local/zlib/' '--with-freetype-dir=/usr/local/freetype/' '--with-pcre-regex=/usr/local/pcre/' '--with-pcre-jit' '--with-pcre-dir=/usr/local/pcre/' '--enable-mbstring' '--enable-pcntl' '--enable-soap' '--enable-shmop' '--enable-sockets' '--enable-sysvsem' '--enable-zip' '--enable-mysqlnd' '--with-mysqli=mysqlnd' '--with-pdo-mysql=mysqlnd'

微信公众号:程序员到架构师

最新文章

Return Top